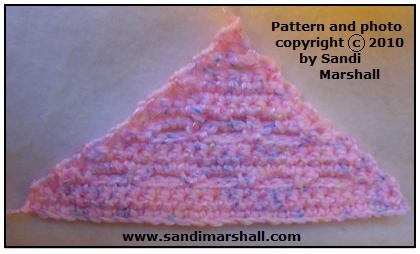
This pattern can help you learn or practice the following crochet techniques: crocheting in a chain space, decreasing in single crochet, skipping stitches
Materials used in the example: Red Heart Fiesta (worsted weight yarn), color Baby Pink
US size H hook
Finished Size: When made with the materials listed above, the finished size is about 8 inches along the starting chain side and 5 1/2 inches on each of the two shorter sides.
 Knowledge Needed For This Pattern:
Substitute any worsted weight or other yarn of your choice. If you use a thicker yarn, such as bulky weight with a US size I, J or K hook, the triangle will be larger. If you use a thinner yarn, such as sport weight with a US size F or G hook, the triangle will be smaller. You could also make it with crochet thread, such as size 10 thread with a US size 7 or 8 steel hook for a very little triangle shape.
Abbreviations: ch = chain, ch-3 sp = chain-3 space, dc = double crochet, ea = each, sc = single crochet, sp = space
These directions are written in American English crochet pattern terms.
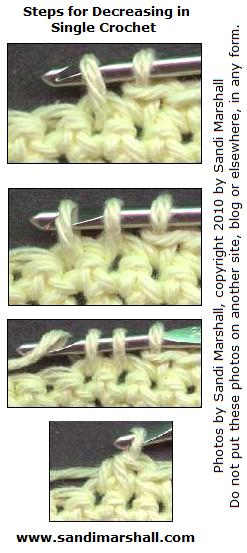
How to make a decrease over two single crochet: (refer to photos on the right, to see the steps that go along with these instructions) Insert hook in first sc to be worked for the decrease, yarn over hook, pull yarn through the stitch (leave this loop on the hook), insert hook in the second sc to be worked for the decrease, yarn over hook, pull this loop through the stitch, yarn over hook, pull yarn through all three loops on the hook (you have just made one decrease in single crochet).
Starting chain: ch 30.
Row 1: sc in 2nd ch from hook, sc in ea ch across. (29 sc)
Row 2: Note – See above for how to decrease. ch 1 to turn, decrease over first 2 sc, sc in ea sc across until only 2 sc remain, then decrease over last 2 sc.
Row 3: Repeat Row 2. (You should have 25 sc in the row at the end of Row 3.)
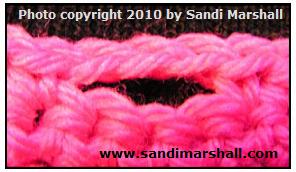
The photo on the right shows the look of these crochet directions: sc in next sc, ch 3, skip next 3 sc, sc in next sc (used in row 4).
Row 4: ch 1 to turn, decrease over first 2 sc, sc in next sc, (ch 3, skip next 3 sc, sc in next sc) 5 times, then decrease over last 2 sc.
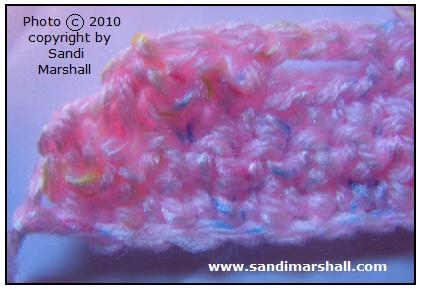
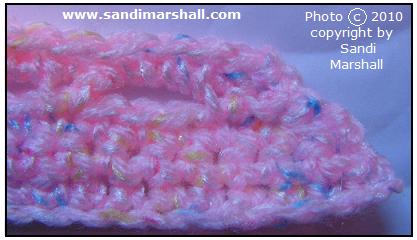
Row 5: ch 1 to turn, decrease over first 2 sc, (make 3 sc in next ch-3 sp, sc in next sc) 4 times, then make 3 sc in next ch-3 sp, decrease over last 2 sc.
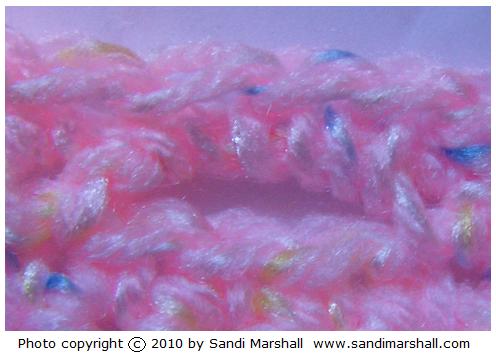
Row 6: ch 1 to turn, decrease over first 2 sc, sc in ea sc across until only 2 sc remain, then decrease over last 2 sc.
Row 7: Repeat Row 6. (You should have 17 sc in the row at the end of 7.)
Row 8: ch 1 to turn, decrease over first 2 sc, sc in next sc, (ch 3, skip next 3 sc, sc in next sc) 3 times, then decrease over last 2 sc.
Row 9: ch 3 to turn, dc in next sc, sc in next ch-3 sp, ch 1, dc in next sc, ch 1, sc in next ch-3 sp, ch 1, dc in next sc, ch 1, sc in next ch-3 sp, dc in ea of last 2 sc.
Row 10: ch 1 to turn, decrease in sc over first two dc, sc in next sc, (sc in next ch-1 sp, sc in next dc, sc in next ch-1 sp, sc in next sc) twice, then sc in next dc, skip the ch-3 at the end of the row.
Row 11: ch 1 to turn, decrease over first 2 sc, sc in ea sc across until only 2 sc remain, then decrease over last 2 sc.
Row 12: Repeat Row 11. (You should have 7 sc in the row at the end of row 12.)
Row 13: ch 1 to turn, decrease over first 2 sc, ch 3, skip next 3 sc, decrease over last 2 sc.
Row 14: ch 1 to turn, insert hook in first sc, yarn over hook, pull yarn through that sc (leave this loop on the hook), insert hook under ch-3 length, yarn over hook, pull yarn through under the ch-3 so that it is in front of the ch-3, yarn over hook, pull yarn through all 3 loops on the hook (this made a decrease using the first sc and the ch-3 length), then sc in same ch-3 space, then make another decrease as follows:
insert hook under ch-3 length, yarn over hook, pull yarn through under the ch-3 so that it is in front of the ch-3 (leave this loop on the hook), insert hook in next sc, yarn over hook, pull yarn through that sc, yarn over hook, pull yarn through all 3 loops on the hook.
Row 15: ch 1 to turn, decrease over first 2 sc, sc in last sc.
Row 16: ch 1 to turn, decrease over the 2 remaining sc.
If you are not adding an outside round or if you are going to add an outside round in a different color, end off now and weave in the ends.
If you are adding an outside round in the same color, continue with:
ch 1, turn so the right side of the piece is facing you, then begin working along the side of the triangle, making one sc in the end of each row along the edge, except for the row which began with a ch-3 and ended with a dc (on that row, you should make 2 sc around the post of the ch-3 on the one side and 2 sc around the post of the dc on the other side when you come to that row).
Outside Round Corners: Make 3 chains to go around each corner as you come to it.
On the bottom side (the edge with the starting chain and first row), sc in the remaining loop of each chain along that side.
Copyright, Terms of Use: Pattern created by Sandi Marshall, copyright 2010 by Sandi Marshall. Per copyright law, do not republish elsewhere and do not sell or give away by reproduced copy in any form, even if it would be made available to others for free, which would not make it any less illegal (f.y.i. – putting it on another web site or blog would be a form of republishing; redistributing by reproduced copy includes by photocopy, email, on a cd disc or any other print or electronic method of copying or reproducing the content of the page).
Linking to this Page: Links to this page are welcome (you don’t have to ask me first, you can just go ahead and link to it). You may give the url of this page to others so that they may come to this site for themselves and benefit from everything this site has to offer. Thank you.
Another Triangle Free Crochet Pattern on This Site: How to Crochet a Long Tall Isosceles Triangle Shape. For those who are reading this on their printout of this pattern: that url is https://www.sandimarshall.com/long-skinny-tall-isosceles-triangle-free-crochet-pattern/
Click on the Share/Save button to let others know about this page through Facebook, Twitter, Digg, etc:

