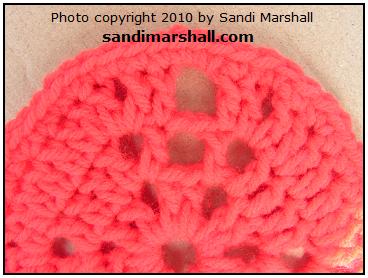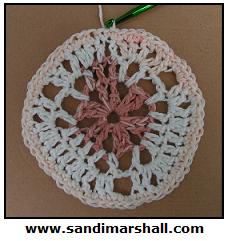
The open parts of the center each have the shape of a bee, stencil style. There are a trio of these stencil bees rotating around the center of this crochet design.
Materials Used in the Examples: I made the red circle with Red Heart Super Saver worsted weight yarn with a US size H crochet hook (for about 5 to 5 1/4 inches in diameter). I made the multicolor and the off-white examples with Peaches n Cream worsted weight cotton yarn with a US size K hook (for about 5 1/2 inches in diameter). When using the larger hook, the stitches are looser. The shape of the stencil bee actually seems to come out better with the smaller H hook, with worsted weight yarn, at least with my own crochet tension. But choose for yourself, use your own judgement or experiment to see what works best for you personally.
Alternate Materials, To Create Different Sizes: Size 10 crochet thread with a US size 7 or 8 steel hook, or any sport weight yarn with a US size G or H hook, or any worsted weight yarn with a US size I, J or K crochet hook, or any bulky weight yarn with a US size J or K hook. Experiment, substitute any other materials that you would like to try with the pattern.
Abbreviations: ch = chain, ch-2 = chain 2, ch-3 = chain-3, ea = each, dc = double crochet, rnd = round, sc = single crochet, sl st = slip stitch, sp = space
Directions are written in American English crochet pattern terms.
If you find that you have questions as you go along, take a look at the photos toward the end of the pattern, which show a close look at the stitches used. This may help you see how the part is made that you had a question about, to make it easy to continue with the pattern instructions and complete your crocheted circle.
To start: ch 7, then join by making a slip stitch in the first chain made, to form a ring.
Next: Insert the hook through the hole in the center of the ring, yarn over hook, pull yarn through the hole in the center of the ring and continue in this same motion to pull this yarn through the loop on the hook; you just made one slip stitch (so the first part will be on the same level with the rest of the stitches).
Rnd 1: ch 3 (counts as first dc), dc in ring, (ch 2, 2 dc in ring) 5 times then ch 2, sl st in the top ch of the beginning ch-3 of this round. You should have 6 groups of 2 dc in each group, with 2 chains between each group.
Rnd 2: ch 3 (counts as first dc), dc in next dc, * (dc, ch 2, dc) in next ch-2 sp, ch 2, skip next 2 dc, (dc, ch 2, dc) in next ch-2 sp, dc in ea of next 2 dc **, repeat the directions between * and ** 1 more time then (dc, ch 2, dc) in next ch-2 sp, ch 2, skip next 2 dc, (dc, ch 2, dc) in next ch-2 sp, sl st in the top ch of the beginning ch-3 of this round.
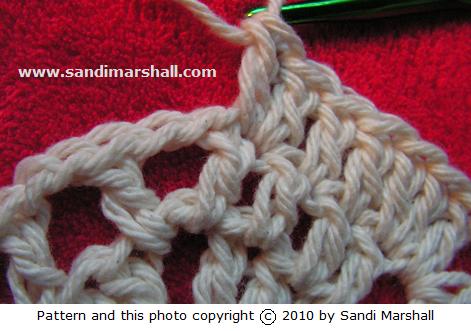
The following photo shows round 3 in progress, being worked into the round 2 stitches.

Rnd 3: ch 3 (counts as first dc), dc in next dc, 2 dc in next dc, * (dc, ch 2, dc) in next ch-2 sp, dc in next dc, ch 2, skip next ch-2 sp, dc in next dc, (dc, ch 2, dc) in next ch-2 sp, 2 dc in next dc, dc in ea of next 2 dc, 2 dc in next dc **, repeat the directions between * and ** 1 more time then (dc, ch 2, dc) in next ch-2 sp, dc in next dc, ch 2, skip next ch-2 sp, dc in next dc, (dc, ch 2, dc) in next ch-2 sp, 2 dc in next dc, sl st in the top ch of the beginning ch-3 of this round.
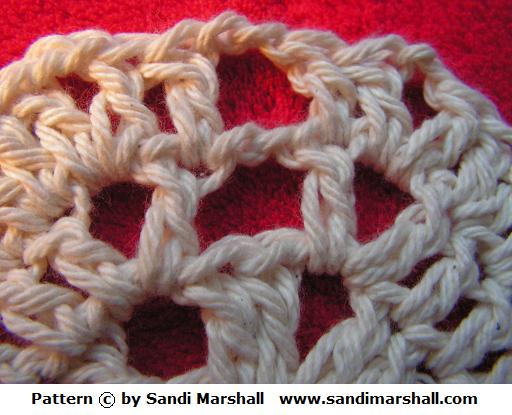
The following photo shows a close look at the open part of the design with round 3 completed.

Rnd 4: ch 1, sc in top ch of beginning ch-3 of round 3 (same place where the sl st was just made), sc in ea of next 2 dc, 2 sc in next dc, sc in next dc, * sc in next ch-2 sp, sc in ea of next 2 dc, 3 sc in next ch-2 sp, sc in ea of next 2 dc, sc in next ch-2 sp, sc in next dc, 2 sc in next dc, sc in ea of next 2 dc, 2 sc in next dc, sc in next dc, 2 sc in next dc, sc in next dc **, repeat the directions between * and ** 1 more time then sc in next ch-2 sp, sc in ea of next 2 dc, 3 sc in next ch-2 sp, sc in ea of next 2 dc, sc in next ch-2 sp, sc in next dc, 2 sc in ea of next 2 dc, sl st in first sc of this round.
Rnd 4 Note: When you are crocheting this round, if you find that the edges ruffle at all, then simply make only 1 single crochet (instead of 2 single crochet) in some of the places where the directions say to make 2 single crochet in a same stitch. The ruffling would have been caused by too many increases around the circle, for your individual crochet tension. Everyone has their own crochet tension (looseness or tightness of the stitches made by a crocheter).
End off. Weave in ends.
Copyright, Terms of Use: Stencil Bees Circle pattern is an original, created by Sandi Marshall. Copyright (c) 2010 by Sandi Marshall. All rights reserved worldwide. Of course, you may print out this page with the pattern directions for your own use (to make items for yourself or for gifts) but, per copyright law, do not republish the contents of this page elsewhere (including my photos) and do not sell or give away by reproduced copy in any form (putting it on another web site or blog would be a form of republishing; reproduced copy includes by photocopy, email, on a cd disc or any other print or electronic method of copying or reproducing the content of the page for the purpose of distributing it to others). Do not use my pattern for commercial purposes (in other words, any way of making money from or gaining a profit from the use of my pattern is prohibited). This pattern is free for your non-commercial use only.
Linking to this Page: Links to this page are welcome (you don’t have to ask me first, you can just go ahead and link to it). You may give the url of this page to others so that they may come to this site for themselves and benefit from everything this site has to offer. Thank you.
The link url of this pattern page is https://www.sandimarshall.com/stencil-bees-circle/
More Free Patterns in my Stencil Bee Design:
Stencil Bee Round Dishcloth
The url is… www.sandimarshall.com/stencil-bee-round-dishcloth
Hexagon Crochet Bee
The url is… www.sandimarshall.com/hexagon-crochet-bee-free-pattern


